Air Conditioning
![]()
When I started doing major engine work on the Monte years ago, I removed the a/c parts. It saves a little weight, cleans up the engine compartment a bit, and the old R12 systems were getting pretty costly to properly service too. Well I've had enough hot days without a/c. It's time to put it back in.
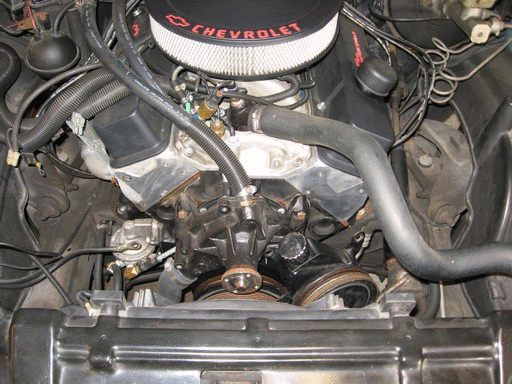
3/27/10 - Here's a 'before' shot with no a/c parts:
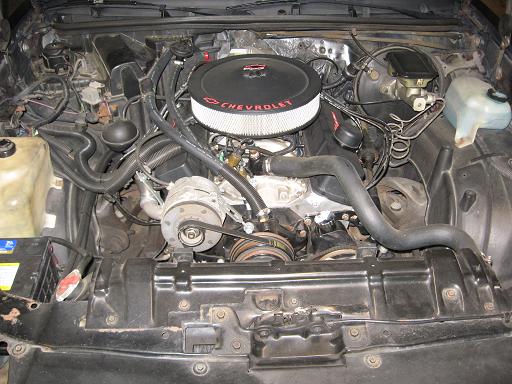
Notice the heater valve already installed in the 5/8 heater hose by the firewall above. I installed the heater valve and condenser 2 years ago thinking I'd do the a/c 'sometime soon' lol. Also, years ago I made the block-off plate that's in the evaporator opening in the heater box.
First up, installing the evaporator. To install it, the heater box cover needs to be removed. The heater box cover might well be the most firmly attached piece of plastic I've ever seen. Only 35 fasteners need to be removed to get in there:
5 windshield trim screws
4 trim bracket nuts
6 inlet screen screws
5 blower motor screws
11 small heater box screws
4 large heater box screws

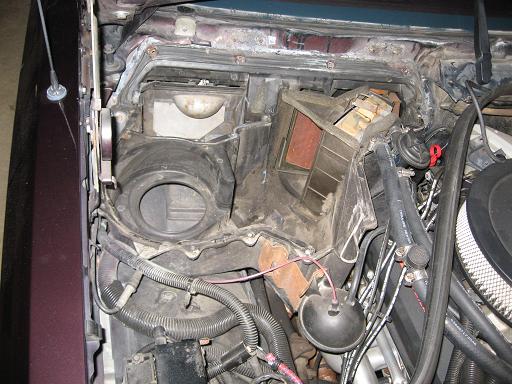
And this is what it looks like inside the highly guarded heater box:
I flushed and cleaned the evaporator, vacuumed the inside of the heater box area, cleaned the cover and installed the evap and heater cover:

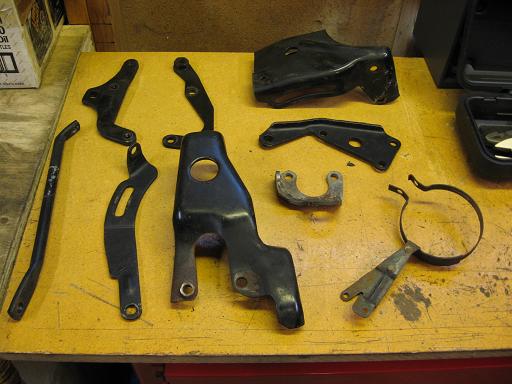
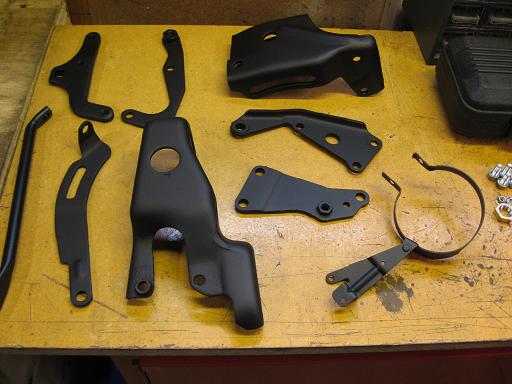
Next up, locate and clean up all of the a/c brackets that I removed 12 years ago.
![]()
4/9/10 - Here's the accessory brackets, before cleaning and paint, and after:
With the brackets cleaned, I put the front accessories back on using a new compressor.
Here's an animation showing the front accessories and brackets being installed:
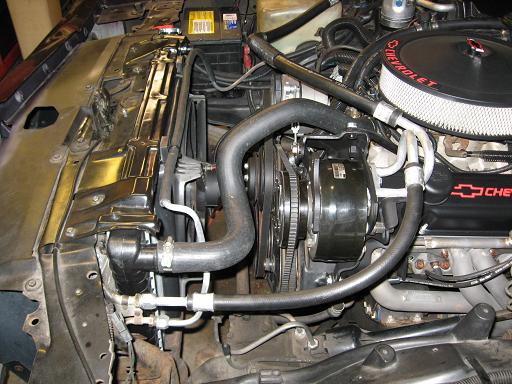
Next up, installing a/c lines. Nope. Scratch that. Next up, swapping valve covers because the driver side die-cast aluminum tall cover doesn't clear the ports on the back of the a/c compressor. The ports are under the little block off plate on the back of the compressor:
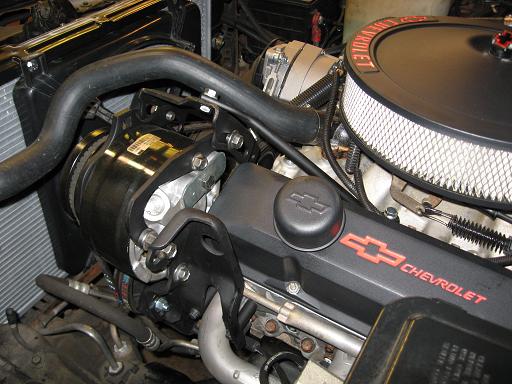
It looks like it's time to go back to stock height valve covers. No problem, I still have the original covers from the 305 and they're in great shape:
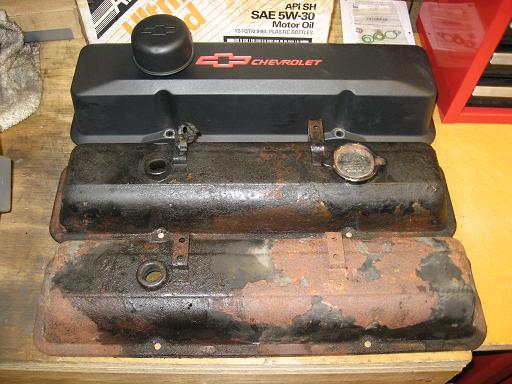
Wow, look at that 'patina'. ;) I was concerned whether stock height valve covers would clear the poly locks and roller rocker arms on the 383, so I cleaned up one of those nasty old covers and carefully positioned it onto the driver side cylinder head. Of course I wasn't going to actually run these covers, but even without a gasket, it cleared the rockers and poly locks. That's what I needed to know, so I could look for some new valve covers.
![]()
5/1/10 - I decided to stay with the black/red finish since I also have the air cleaner, timing cover and breather to match:

And with the new valve covers installed:
![]()
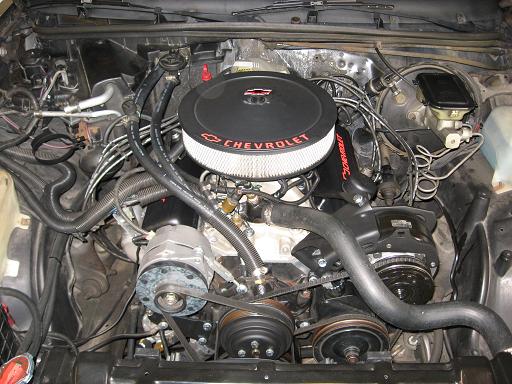
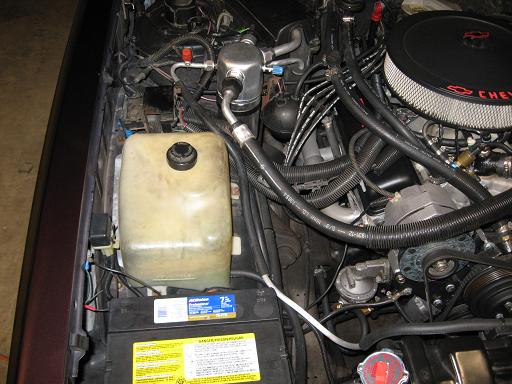
5/15/10 - Cleaned up and installed the solid a/c line using a new orifice valve in the evaporator inlet pipe, then I cleaned up and installed the flexible a/c hoses:
And finally, I installed a new accumulator, added the refrigerant oil and tightened up the last connections:
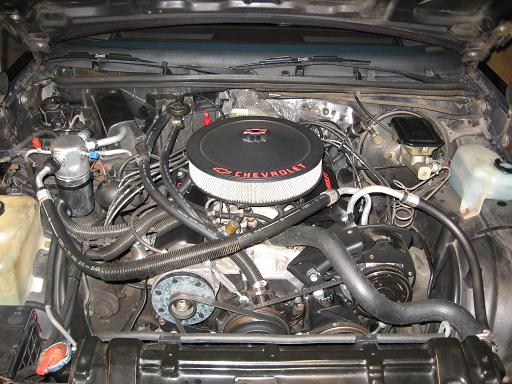
Here's a before and after comparison with all the a/c parts back in:
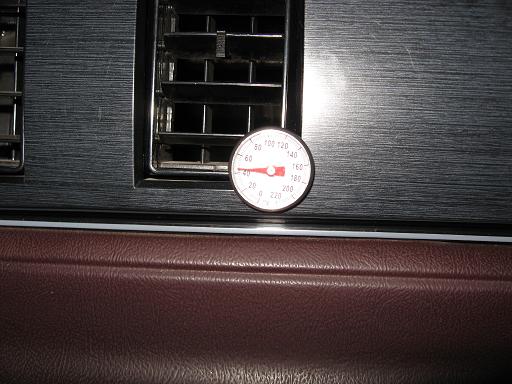
After charging it up, it was blowing nice and cold:
![]()